Powered By Blogger

Selasa, 11 Oktober 2011

TURTORIAL MACRO MEDIA FLASH

Macromedia Flash Tutorial

Take our Macromedia Flash tutorial. Our Macromedia Flash tutorial covers creating graphics, working with layers, and adding motion, sound, and text to your Macromedia Flash movie.
Table of Contents

Adding New Layers

Create a new layer for the sky.
  1. Choose Insert > Timeline > Layer from the menu to create a new layer above the active layer.
  2. Choose Modify > Timeline > Layer Properties from the menu. The Layer Properties dialog box opens.
  3. Type Sky in the Name field.
  4. Click OK.
Create the Sky
  1. Make sure Sky is the active layer. When a layer is active, it is highlighted and there is a pencil icon on the layer. You click on the layer name to make a layer active.
  2. Move to the Library panel. If the Library panel is not open, choose Window > Library from the menu to open the Library.
  3. Click the icon next to Sky and drag a copy of Sky onto the Stage.
Adding the sky

Rotate

You can use the Modify menu tool to rotate an object. You need to rotate the Sky instance to create the sky.
Note: When you take an object out of the Library, the object is referred to as an instance of a symbol.
  1. Choose the Selection tool.
Selection tool
  1. Click the Sky symbol to select it.
  2. Choose Modify > Transform > Rotate 90 CW from the menu.

Resize

You need the sky to fill the top part of the Stage. You must resize the Sky instance. You can use the Property inspector to resize an object.
  1. Choose Window > Properties > Properties from the menu if the Property inspector is not open.
  2. Choose the Selection tool.
  3. Click the Sky instance to select it.
  4. Click the Proportional icon in the Property inspector to deselect the Proportional option. When the Proportional option is selected, adjusting the width changes the height proportionally, and vice versa.
Adjust width and height
  1. Set the W field to 400.
  2. Set the H field to 240.
  3. Click and drag until the sky is over the buildings.
Click and drag sky

Changing the Order of Layers

You want to place the sky behind the buildings.
  1. Click the Sky layer on the Timeline.
  2. Drag the Sky layer downward to place it below the Buildings layer.
Change layer order
Change layer order

Flash Movie

Create your own Flash movie. Take our Flash 8 tutorial to learn how. Our Flash tutorial covers creating graphics, working with layers, and adding motion, sound, and text to your Flash movie.
Table of Contents
Add Grass
Add grass
  1. Choose the Selection tool.
  2. Click the Buildings layer name to make the Buildings layer the active layer.
  3. Click anywhere outside the Stage to deselect the buildings.
  4. Choose the Rectangle tool.
  5. Click the Stroke color box and choose no color as the stroke color.
  6. Click the Fill color box and choose bright green as the fill color.
  7. Draw a rectangle below the buildings for the grass.
Add a Road
Add a road
  1. Click the Fill color box and choose bright gray as the fill color.
  2. Draw a second rectangle below the green rectangle. The second rectangle is a road.
Add a Title Area
Add a title area
  1. Click the Fill color box and choose purple as the fill color.
  2. Draw the last rectangle, as shown.
Add Trees
Now you will add two trees to your movie.
Create a Trees Layer
Create a new layer and name it Trees.
  1. Make sure Buildings is the active layer. (You click on the layer name to make a layer active.)
  2. Choose Insert > Timeline > Layer from the menu. A new layer appears at the top of the Timeline.
  3. Choose Modify > Timeline > Layer Properties from the menu. The Layer Properties dialog box opens.
  4. Type Trees in the Name field.
  5. Click OK.
Get a Tree
Take a tree from the Library.
  1. Move to the Library. If the Library panel is not open, choose Window > Library from the menu.
  2. Click the icon next to Tree and drag a tree onto the Stage.
Get a tree
Resize the Tree
  1. Choose the Free Transform tool. Handles appear around the tree.
Free Transform tool
  1. Choose the Scale Modifier.
  2. Drag a corner handle until the tree is the appropriate size.
  3. Place the tree in front of a building.
  4. Place another tree on the Stage and repeat the process.
Resize trees

Selasa, 27 September 2011

Shape Tweening (Animasi Perubahan Bentuk)

Flash Shape Tweening

This lesson will teach you how to create a "shape tween" by taking two shapes and using them to morph from one shape to another and back again. Shape tweening is a term used in Macromedia Flash to refer to the transition from one shape to another.

Shape Tween Setup

Before we can create our tween we are going to need the shapes that will be used to produce the tween effect. First, create a simple rectangle like the one we have below, in frame 1 of your timeline.

Inserting KeyFrames

Select frame 25 in the timeline window and insert a KeyFrame. Select frame 50 and insert another KeyFrame. Notice that there is a shaded area from frame 1 to 50. This is your "active" area and the animation is going to occur within this area.

Changing Our Shapes

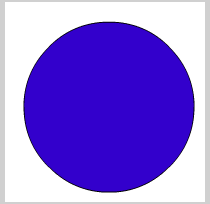
We want our shape to morph from one shape to another. For contrast let's have our red box morph into a blue circle.
Select the middle frame, frame 25, and draw a big blue circle on top of the existing red box, so that it is completely covered. Using the Oval Tool in frame 25, hold shift, left-click and drag to create a large blue circle. Your stage should now look like this for frame 25.

Inserting the Shape Tween

In the timeline window, select any frame from 2-24 using left-click. In the Properties window you will now see an option to tween. It is currently set to none. From the Tween drop down selector choose Shape.

Now insert another KeyFrame at frame 26. Left click any frame from 27-49 and once again select the Shape Tween from the Properties window.

If you have a dotted line, rather than a solid line in your Timeline window, be sure that you followed the instructions up to this point exactly.

Test the Tween Out

Shape Tweening (Animasi Perubahan Bentuk)

Creation of Motion/Shape tween using timeline is the basics of Flash.

By tweening shapes, you can create an effect similar to morphing, making one shape appear to change into another shape over time. Flash can also tween the location, size, and color of shapes.

Please note:
1. You need to have Flash Player 7.0 installed to view the Flash animation.
2. Flash MX 2004 must be installed in your system to download the .fla file. This tutorial will teach you a simple shape tween.

Steps to follow:

  • Open a new flash file (Ctrl+N).
    New Document window will appear
    Select General panel and choose Type: Flash Document . Press OK.
  • If your timeline window is not open, press (Ctrl+Alt+T).
  • Now you can see a single Layer called "Layer1" in your timeline Window.

  • Select the first frame. Now go to your working area and draw any object. To start off with, may be you can draw a circle.This is going to be your initial object.
    In the above demonstration, my initial object is a short line.
  • Select frame 20 and press F6 to insert a new keyframe.
  • Still keeping playhead on frame 20, delete the object present in your working area. Now draw a different object, may be a square.
    In the above demonstration, I have drawn a long line.
  • Select any frame between, 2 to 19 and select Shape from the tween pop-up menu in the Property inspector. Now your Layer will look something like the one shown below.

  • Now press (Ctrl+Enter) to view your motion tween.

Animasi Motion Tween

Flash can create two types of tweened animation using timeline:
Motion Tween &
Shape Tween Creation of Motion/Shape tween using timeline is the basics of Flash.

Motion tween is nothing but tweening a Symbol's movement from one position to another.
To implement Motion Tween all that you have to do is, provide Flash with Symbol's initial position and the end position. Rest is taken care by Flash. Isn't it really simple.


For example in the above demonstration, I have converted the pencil object to a Symbol. Provided Flash with its initial and the end position, intermediate tweening is done by Flash. Motion Tween animation is as simple as that :)
Okay, you ready to learn how to create motion tween. All you have to do is just follow this tutorial step by step.

Please note:
1. You need to have Flash Player 7.0 installed to view the Flash animation.
2. Flash MX 2004 must be installed in your system to download the .fla file.
Steps to follow:
  • Open a new flash file (Ctrl+N).
    New Document window will appear
    Select General panel and choose Type: Flash Document . Press OK.
  • If your timeline window is not open, press (Ctrl+Alt+T).
  • Now you can see a single Layer called "Layer1" in your timeline Window.

  • Select the first frame. Import your image onto stage, upon which you would want to implement motion tween.
    File>Import>Import to Stage, or just press (Ctrl+R).
    Or you can even draw your own object, you can either choose Rectangular tool or Oval tool from the tool box and draw your desired shape.
  • Now select your object on the stage and press F8 to convert this image to a Symbol. Convert to Symbol window will pop-up.
    Name your Symbol what ever you like.
    Select Graphic behavior and press OK.

    Note: You can create motion tween only on symbols. So any object upon which you would want to implement motion tween, First convert the object to a Symbol.

  • Right now your Symbol is in frame1 of Layer1. Select frame 20 and press F6 to insert a new keyframe.
  • Still keeping playhead on frame 20, move your Symbol to any other position other than the present one.
  • Select any frame between, 2 to 19 and select Motion from the tween pop-up menu in the Property inspector. Now your Layer will look something like the one shown below.

  • Now press (Ctrl+Enter) to view your motion tween.

Animasi Frame by Frame

flash,animasi kursor

Jumat, 02 Januari 2009

Animasi Frame to Frame

Animasi ini adalah jenis animasi yang paling banyak memakan kapasitas file dan memori, karena itu lebih baik penggunaan animasi ini hendaknya diminimalis. Animasi frame per frame menuntut banyak gambar yang harus dibuat. Efek animasi diciptakan dengan mengganti gambar yang satu dengan gambar yang lain selama beberapa waktu.. Semua gambar yang bergerak dihasilkan dari gambar yang berbeda-beda tiap framenya. Karena animasi frame per frame harus memiliki gambar yang unik tiap framenya maka animasi frame per frame sangat ideal untuk membuat animasi yang kompleks yang terdiri dari banyak perubahan seperti ekspresi wajah.
Membuat animasi frame per frame
Di bawah ini akan ditunjukkan proses pembuatan animasi frame per frame :
1. Buka file baru atau Ctrl+N.
2. Kemudian kita pilih Rectangle Tool (R) pada toolbox dan kita mulai
membuat objek balok pada stage dengan mengklik dan drag, jangan lupa warna fiil objek balok harus berbeda dari warna background stage.
3. Kemudian klik kanan di frame ke-1, pilih Insert Keyframe atau tekan F6, maka akan muncul frame ke-2.
4. Pada frame ke-2 kita pilih Free Transform Tool (Q), kemudian kita putar balok sedikit ke kanan dan letaknya dirubah sedikit kebawah dengan meneka tombol Shift + Panah bawah satu kali.
5. Kemudian masukan kembali KeyFrame hingga menjadi tiga frame, kemudian putar kembali balok sedikit ke kanan dan sedikit kebawah.
6. Ulangi langkah di atas sampai frame 8 hingga balok tampak jatuh.
7. Kemudian tekan Enter untuk melihat hasilnya.

Selasa, 20 September 2011

flash

FLASH

Untuk membuat animasi, khususnya dengan menggunakan macromedia flash, persiapan yang perlu dilakukan antara lain:


  1. Topik yang akan dianimasikan.
  2. Sketsa umum alur Cerita.
  3. Teknik yang dipilih untuk melakukan tweening.
  4. Rancangan bentukan yang akan dianimasikan.
  5. Pembagian layer dan pemanfaatan jenis layer.
  6. Pembagian dan pengaturan frame.
  7. Ukuran bidang tampilan (stage).
Saat berencana untuk membuat animasi, tentunya yang terlintas dibenak kita adalah apa topik utama yang akan digambarkan pada animasi tersebut kemudian menyusun alur cerita secara garis besar baik dalam bentuk diagram alir (flow chart) ataupun urutan sketsa gambar secara kasar.  Kedua hal tersebut akan menentukan bentukan-bentukan yang akan ditampilkan pada animasi.
Seringkali kita berhadapan dengan keterbatasan fasilitas aplikasi dan kemampuan peralatan dalam membuat animasi, disamping keterbatasan tingkat pengetahuan kita sendiri.  Akan tetapi dengan proses kreasi kita bisa melakukan ‘akal-akalan’ baik saat merancang bentukan yang akan dianimasikan dan pembagian layer-nya, saat melakukan pembagian dan pengaturan frame, maupun saat pemilihan teknik untuk melakukan tweening.  Proses kreasi bahkan bisa membuat keterbatasan menjadi peragaan yang menarik. Untungnya, membuat animasi tidak perlu untuk selalu terikat pada gerakan atau perubahan yang logis, asalkan pesan dapat tersampaikan dan menarik.  Bahkan gerakan yang tidak logis sering kali bisa menambah unsur kelucuan di dalamnya.  Kita pernah menonton film kartun tempo doeloe dimana saat jatuh ke jurang  sang pemeran yang jatuh tidak mengikuti garis parabola seperti yang diajarkan guru fisika kita di sekolah, tetapi pertama mengikuti garis mendatar sebelum sang pemeran tersadar kemudian jatuh secara vertikal ke bawah.  Itupun tidak ditampilkan kapan dan bagaimana model sang pemeran yang naas ini saat berhasil menyentuh sasaran jatuhnya.  Yang tampak hanyalah layar yang bergetar dan skets selanjutnya sang pemeran duduk tekulai dengan bintang-bintang berputar di kepala.  Sang penontonpun tersenyum dan sadar bahwa sang pemeran telah jatuh dengan sempurna, tanpa hambatan apapun.  Pesan telah tersampaikan dan lupakan unsur logika.
Tambahan pula macromedia flash juga menyediakan beberapa fasilitas yang sangat mempermudah kita melakukan trik tambahan saat membuat animasi.  Namun perlu pula disadari bahwa aplikasi ini lebih fokus pada proses animasi.  Fasilitas untuk penyiapan bentukan yang akan dianimasikan sangat terbatas.  Untuk penyiapan bentukan yang lebih rumit kita bisa menggunakan macromedia fireworks atau aplikasi lain seperti dari adobe atau xara.
Suatu bentukan yang akan dianimasikan bisa ditempatkan pada beberapa layer tergantung pada kerumitan gerakan yang akan direncanakan.  Untuk membuat animasi dua dimensi yang melukiskan mobil bergerak misalnya, tiga layer dapat diperuntukkan masing-masing untuk body mobil, roda depan, dan roda belakang. Kemudian melakukan motion tweening, translation tweening untuk body mobil dan translation plus rotation tweening untuk kedua roda mobil, depan dan belakang.
Demikian juga untuk membuat animasi gerakan burung terbang, 7 layer dapat disiapkan masing-masing untuk, kepala, badan, ekor, kaki kanan, kaki kiri, sayap kanan dan sayap kiri.  Kemudian melakukan shape tweening terhadap kedua sayap burung, ekor, kedua kaki, maupun kepala burung.  Dengan demikian gerakan yang lebih fleksibel dapat ditampilkan.  Kecuali anda ingin membuat animasi frame by frame dimana anda hanya membutuhkan satu layer tetapi lebih banyak bentukan di tiap keyframe-nya yang mengakibatkan penggunaan memori yang lebih besar.
Jika kita membuat animasi dengan menggunakan macromedia flash, jenis layer dapat dikembangkan ke  motion guide atau mask.  Layer motion guide digunakan untuk membimbing suatu pergerakan (tweening) melalui suatu alur yang ditetapkan pada layer motion guide tersebut.  Misalnya, kita membuat animasi gerakan boomerang yang melengkung balik ke pelemparnya.  Kita tinggal menempatkan boomerang pertama pada titik awal dan titik akhir dari lintasan melengkung.  Layer untuk boomerang berada terpisah dan dibawah layer motion guide dari lintasannya.  Layer untuk boomerang menjadi sublayer dari layer motion guide.  Layer Mask digunakan untuk membatasi bidang tampilan animasi bagi bentukan yang berada pada sublayer-nya.  Misalnya,  kita membuat animasi mobil bergerak pada layar televisi, tetapi yang bergerak jalannya bukan mobil sehingga mobil kelihatan bergerak.  Untuk maksud ini jalan dibuat lebih panjang dari lebar layar televisi.  Layar televisi akan menjadi bentukan mask pada layer mask sedangkan jalan berada pada sublayer dari layer mask tersebut  Tetap bedakan antara layar dengan layer.  Layer mask mengandung bentukan mask yang dibuat seukuran dan ditempatkan pada layar tetevisi agar yang tampak hanya bagian jalan yang berada pada layar televisi.
Frame menentukan penataan waktu dan kecepatan pergerakan animasi flash.  Secara default macromedia flash menetapkan 12 fps (frame per second).  Akan tetapi kita dapat mengubahnya ke 24 fps, misalnya, jika kita bermaksud meng-upload hasil dari membuat animasi ke youtube.  Demikian juga ukuran bidang tampilan (stage), yang secara default pada macromedia flash berukuran 550 x 400 pixel , kita dapat mengubahnya sesuai dengan maksud peragaan animasi.
Disamping fasilitas-fasilitas dasar tweening, macromedia flash juga menyediakan script yang dapat digunakan untuk mengontrol aliran animasi.
Akhirnya, selain dari semua fasilitas yang tersedia proses kreasi merupakan unsur sangat penting saat membuat animasi termasuk Animasi Flash

Selasa, 13 September 2011

macro

Adobe Flash

Dari Wikipedia bahasa Indonesia, ensiklopedia bebas
Logo Macromedia Flash 8 Professional
Adobe Flash (dahulu bernama Macromedia Flash) adalah salah satu perangkat lunak komputer yang merupakan produk unggulan Adobe Systems. Adobe Flash digunakan untuk membuat gambar vektor maupun animasi gambar tersebut. Berkas yang dihasilkan dari perangkat lunak ini mempunyai file extension .swf dan dapat diputar di penjelajah web yang telah dipasangi Adobe Flash Player. Flash menggunakan bahasa pemrograman bernama ActionScript yang muncul pertama kalinya pada Flash 5.
Sebelum tahun 2005, Flash dirilis oleh Macromedia. Flash 1.0 diluncurkan pada tahun 1996 setelah Macromedia membeli program animasi vektor bernama FutureSplash. Versi terakhir yang diluncurkan di pasaran dengan menggunakan nama 'Macromedia' adalah Macromedia Flash 8. Pada tanggal 3 Desember 2005 Adobe Systems mengakuisisi Macromedia dan seluruh produknya, sehingga nama Macromedia Flash berubah menjadi Adobe Flash.
Adobe Flash merupakan sebuah program yang didesain khusus oleh Adobe dan program aplikasi standar authoring tool professional yang digunakan untuk membuat animasi dan bitmap yang sangat menarik untuk keperluan pembangunan situs web yang interaktif dan dinamis. Flash didesain dengan kemampuan untuk membuat animasi 2 dimensi yang handal dan ringan sehingga flash banyak digunakan untuk membangun dan memberikan efek animasi pada website, CD Interaktif dan yang lainnya. Selain itu aplikasi ini juga dapat digunakan untuk membuat animasi logo, movie, game, pembuatan navigasi pada situs web, tombol animasi, banner, menu interaktif, interaktif form isian, e-card, screen saver dan pembuatan aplikasi-aplikasi web lainnya. Dalam Flash, terdapat teknik-teknik membuat animasi, fasilitas action script, filter, custom easing dan dapat memasukkan video lengkap dengan fasilitas playback FLV. Keunggulan yang dimiliki oleh Flash ini adalah ia mampu diberikan sedikit code pemograman baik yang berjalan sendiri untuk mengatur animasi yang ada didalamnya atau digunakan untuk berkomunikasi dengan program lain seperti HTML, PHP, dan Database dengan pendekatan XML, dapat dikolaborasikan dengan web, karena mempunyai keunggulan antara lain kecil dalam ukuran file outputnya
Movie-movie Flash memiliki ukuran file yang kecil dan dapat ditampilkan dengan ukuran layar yang dapat disesuaikan dengan keingginan. Aplikasi Flash merupakan sebuah standar aplikasi industri perancangan animasi web dengan peningkatan pengaturan dan perluasan kemampuan integrasi yang lebih baik. Banyak fiture-fiture baru dalam Flash yang dapat meningkatkan kreativitas dalam pembuatan isi media yang kaya dengan memanfaatkan kemampuan aplikasi tersebut secara maksimal. Fiture-fiture baru ini membantu kita lebih memusatkan perhatian pada desain yang dibuat secara cepat, bukannya memusatkan pada cara kerja dan penggunaan aplikasi tersebut. Flash juga dapat digunakan untuk mengembangkan secara cepat aplikasi-aplikasi web yang kaya dengan pembuatan script tingkat lanjut. Di dalam aplikasinya juga tersedia sebuah alat untuk men-debug script. Dengan menggunakan Code hint untuk mempermudah dan mempercepat pembuatan dan pengembangan isi ActionScript secara otomatis.